
Portenta H7 Lite
The Portenta H7 Lite follows the Arduino MKR form factor, but enhanced with the Portenta family 80 pin high-density connector. Program it with high-level languages and AI while performing low-latency operations on its customizable hardware.
The Portenta H7 Lite is very similar to the Portenta H7, that simultaneously can run high level code along with real time tasks thanks to its two processors. It is, for example, possible to execute Arduino compiled code along with MicroPython one and have both cores to communicate with one another. However, the H7 Lite is a low-cost board with H7 functionalities that can be configured to specific use cases.

The Portenta H7 allows for programming with high-level languages and AI while performing low-latency operations on its customizable hardware.

H7's main processor is the dual core STM32H747 including a Cortex® M7 running at 480 MHz and a Cortex® M4 running at 240 MHz. The two cores communicate via a Remote Procedure Call mechanism that allows calling functions on the other processor seamlessly.


Essentials
First Steps
Suggested Libraries
Arduino Basics
Tutorials
In this tutorial you will run two classic Arduino blink programs simultaneously on different cores of the Portenta board that blinks the RGB LED in two different colours.
This tutorial explains how to create a Flash-optimized key-value store using the Flash memory of the Portenta H7.
This tutorial teaches you how to set up the board, how to use the OpenMV IDE and how to run a MicroPython blink example with OpenMV.
This tutorial will show you how to use the Lauterbach TRACE32 GDB front-end debugger to debug your Portenta H7 application via GDB on a serial interface.
This tutorial demonstrates how to use the on-board Flash memory of the Portenta H7 to read and write data using the BlockDevice API provided by Mbed OS.
Learn how to use secure boot on the Arduino Portenta H7.
This tutorial teaches you how to set up the board, how to configure your computer and how to run the classic Arduino blink example to verify if the configuration was successful.
This tutorial teaches you how to set up the Portenta H7 to act as a USB host in a way that allows to connect peripherals such as a keyboard or mouse to interact with it.
Resources
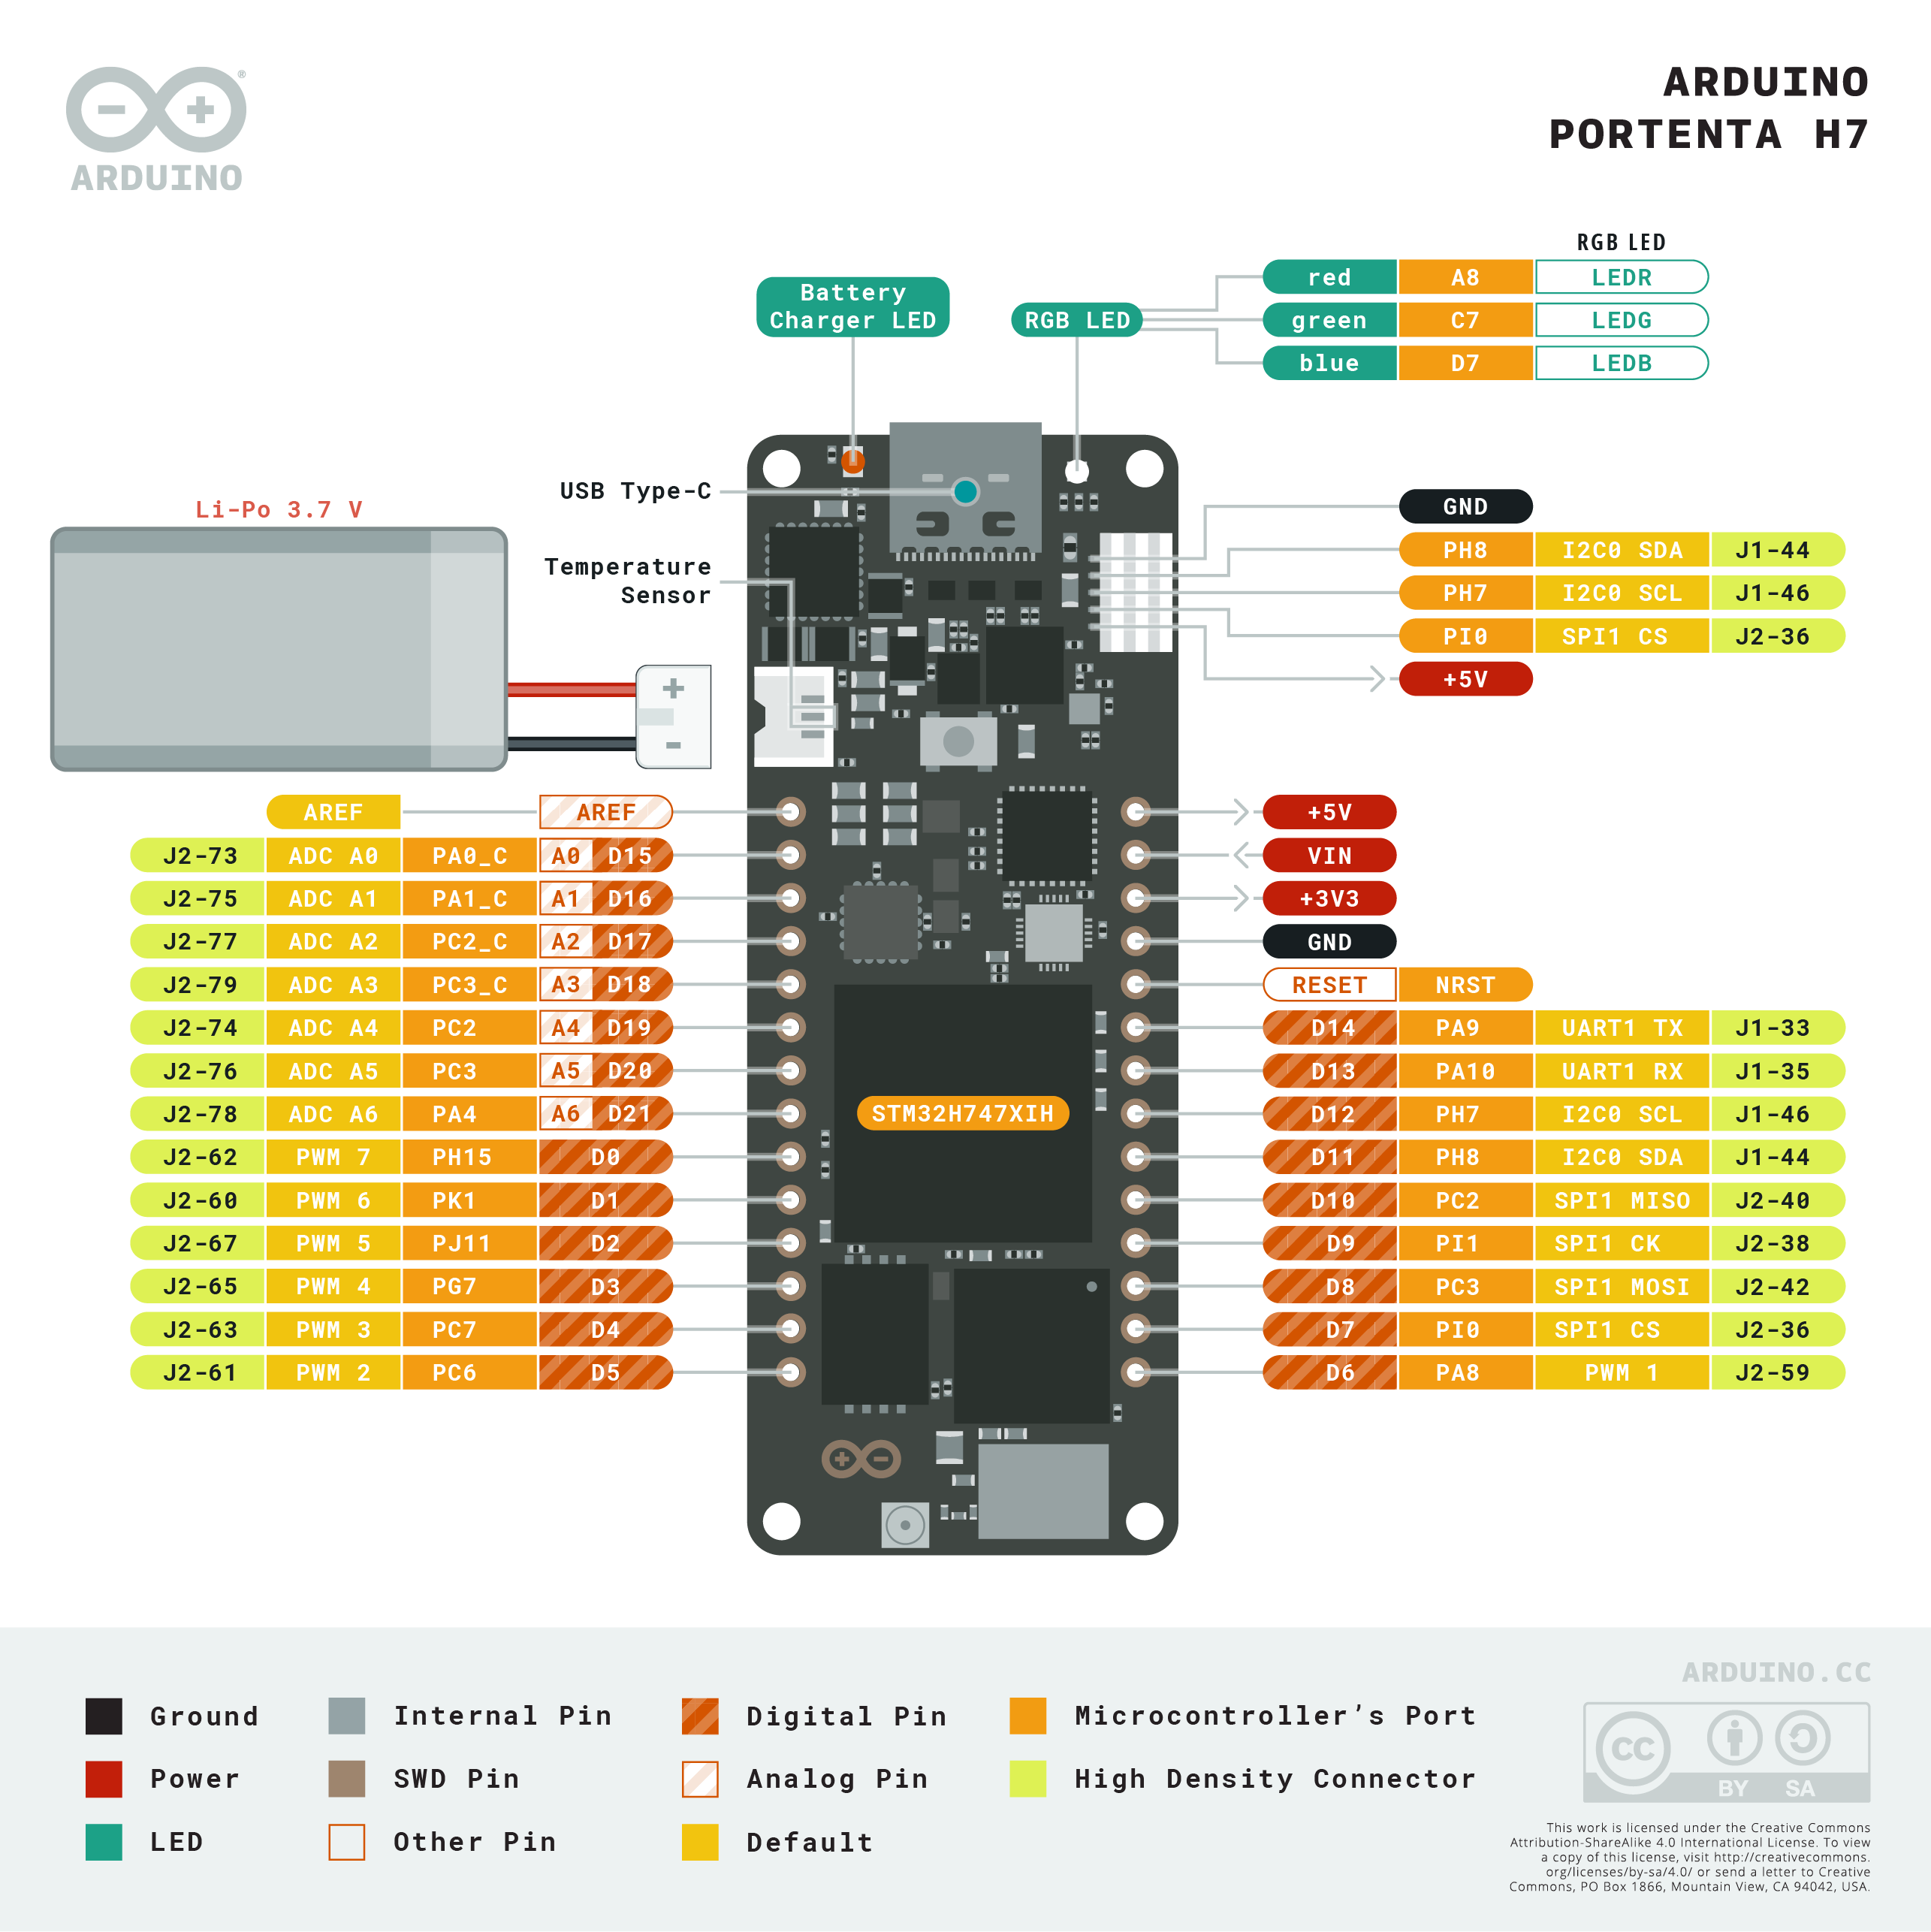
Pinout Diagram
A diagram showing the functions and the arrangement of the pins on your product.