Portenta X8 Getting Started
Required Hardware and Software
- Portenta X8 board.
- Wi-Fi AP with Internet access.
- Arduino Pro Cloud Subscription. Learn more about the Pro Cloud.
Attention: We encourage you to check every now and then if the device image version is up to date in order to have the latest bootloader, please check the tutorial How to flash your Portenta X8 for instructions.
Connecting to the Board
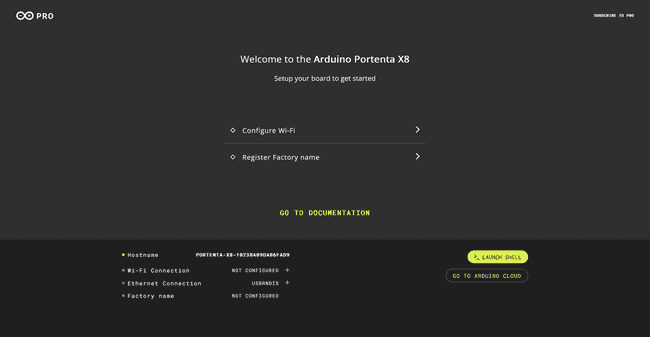
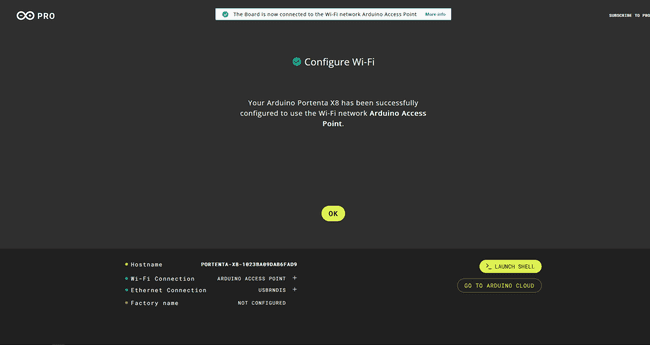
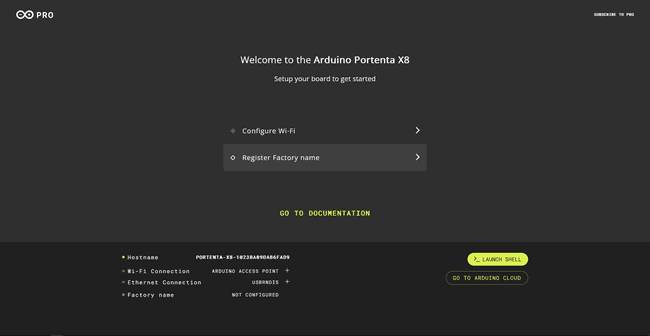
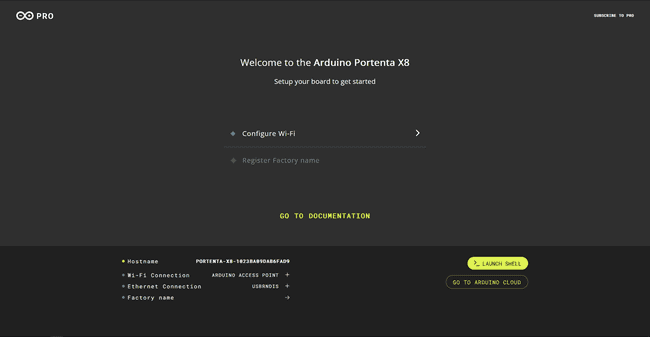
Once the Portenta X8 is plugged in via USB, you can open your browser and go to http://192.168.7.1 if you use Windows and Linux or http://192.168.8.1 on MacOS. It can take up to 15 seconds for the board to boot up and make the page available. This web page is hosted on the Portenta X8, from this dashboard you will be able to:
- Configure Wi-Fi
- Add your device to a FoundriesFactory (OTA)
- Board details
- Shell (alpine python)
Connecting to Your Wi-Fi
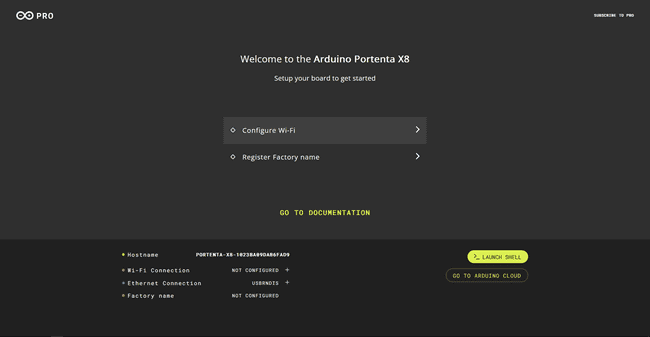
Click the Wi-Fi button to start configuring your network connection.
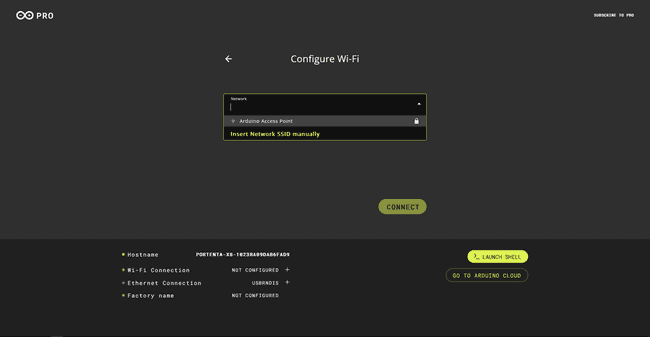
Select your Wi-Fi SSID.
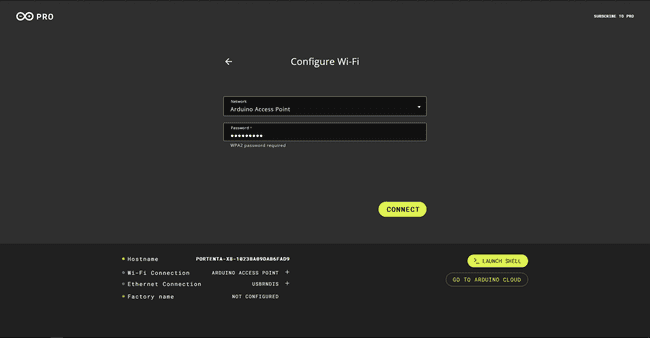
Type the password.
Once it is connected, you should see the Wi-Fi status bullet in the bottom left turning green.
You can change your network by clicking on the button again and repeat the above steps
Connect to a FoundriesFactory
Register the FoundriesFactory on Foundries.io
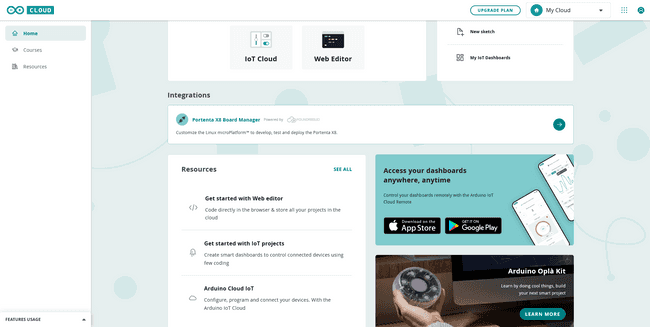
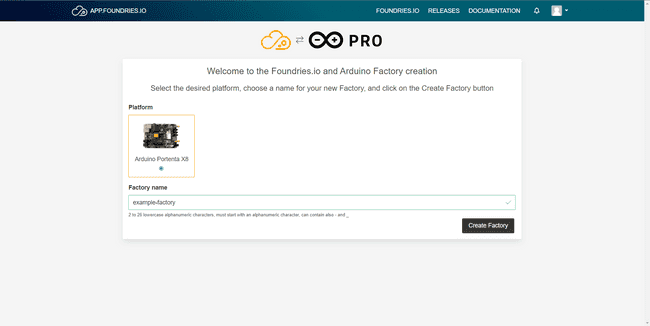
The integration with Foundries.io requires the Arduino Pro Cloud Subscription, contact us at Arduino Pro Inquiries, or learn more on the Arduino Pro Page Go to https://create.arduino.cc and click on Portenta X8 Board Manager, you will get prompted to set a new
FactoryIt will redirect you to the FoundriesFactory registration page.
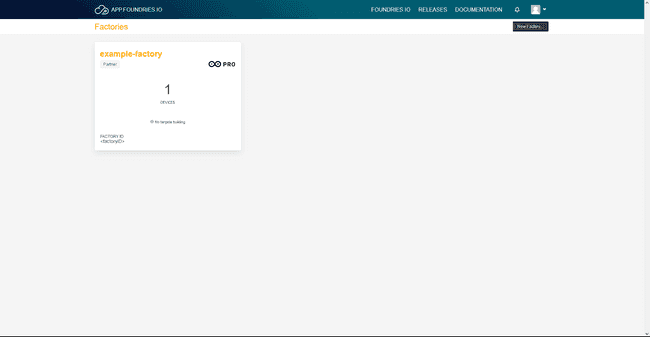
Then you can go to https://app.foundries.io/factories and it will show the Factory you just created.
After you have created your FoundriesFactory you need to go back to the Portenta-X8 web dashboard to add a new device into your new Factory.
Add A New Device To Your Factory
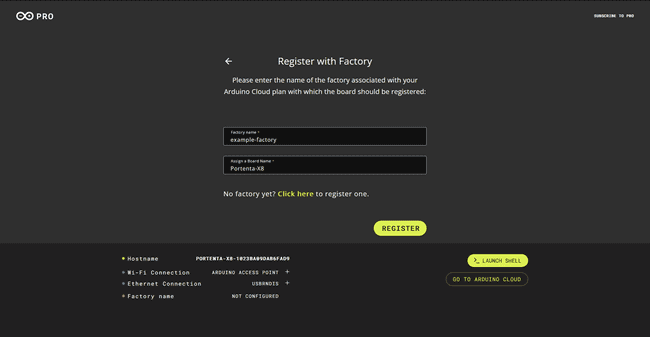
Click the "Register Factory name" button.
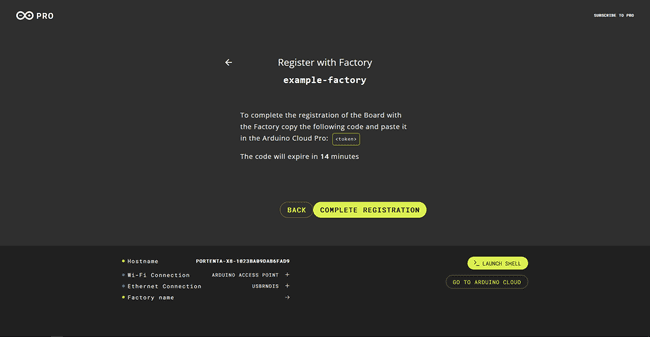
The next panel gives you a code that you need to copy.
Click on the "Complete registration" button on the Portenta X8 dashboard
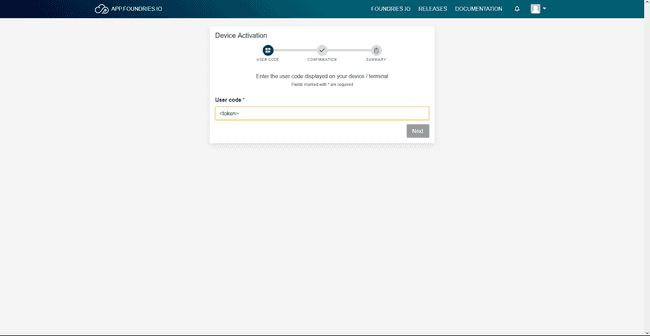
The button will open the Foundries.io activation page. Paste your token in the text box and press continue.
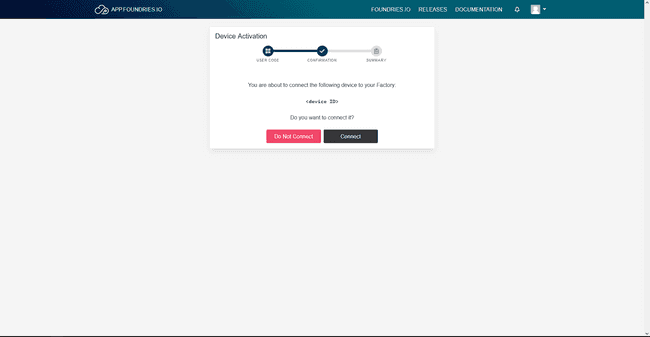
Confirm the addition of the new device by pressing "Connect"
Finally you will see a confirmation which means that your device now is attached to the new Factory.
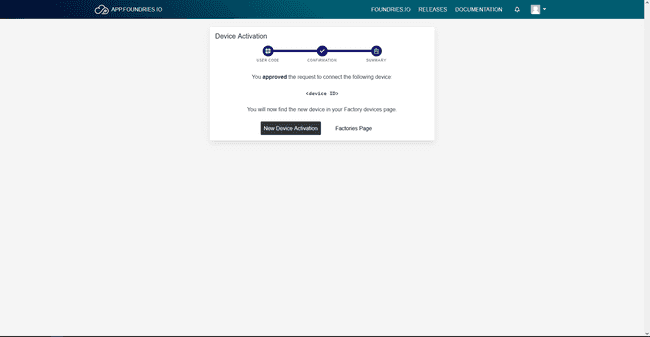
Once it is completed, the Factory button on the Portenta X8 dashboard will turn green.
Check Your FoundriesFactory
Have a look to your factories by going to Foundries.io factories page
Select the Factory that you want to check and it will open its dashboard.
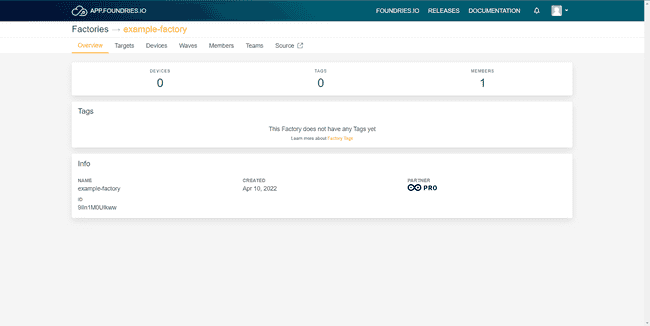
Check Your Device
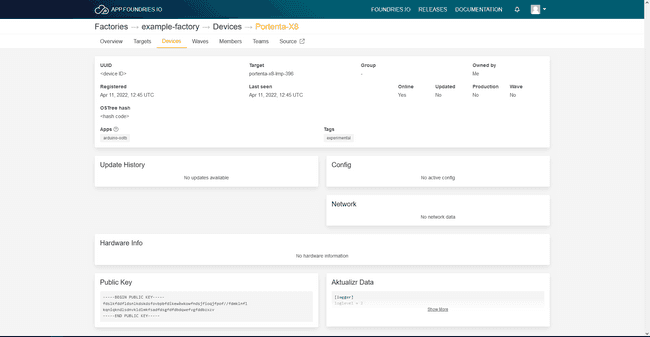
You can check if your device is fully connected to your Factory by going to the "devices" tab.
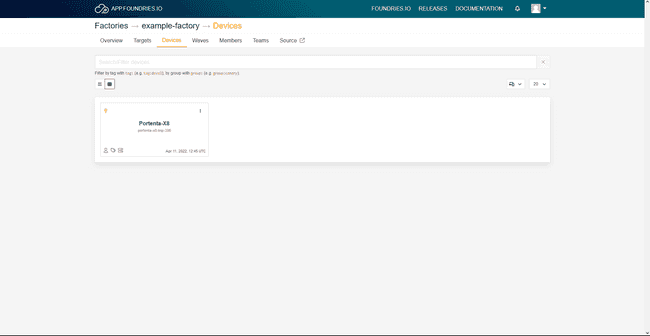
Then choose the device you want to check by clicking on its box and it will open its page.
Controlling Portenta X8 Through the Terminal
You have plenty of ways to communicate with your board, be it wirelessly or with a cable. Next we are going to show how to use adb and ssh.
ADB
First of all make sure you have the latest Mbed OS Portenta Core, which contains the adb program.
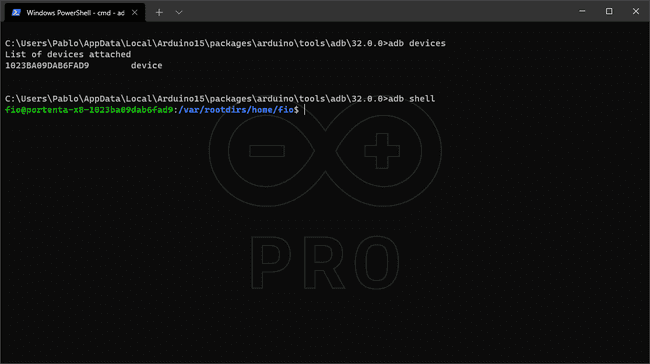
You can go to its directory inside the Arduino15/packages/arduino/tools/adb/32.0.0. To check the tool you can use your terminal and type
adbTo know the list of devices that can be accessed type
adb devicesIf you only see one device you can try and type
adb shellSSH
SSH is commonly used for remote control on different kinds of devices running different set ups through TCP-IP.
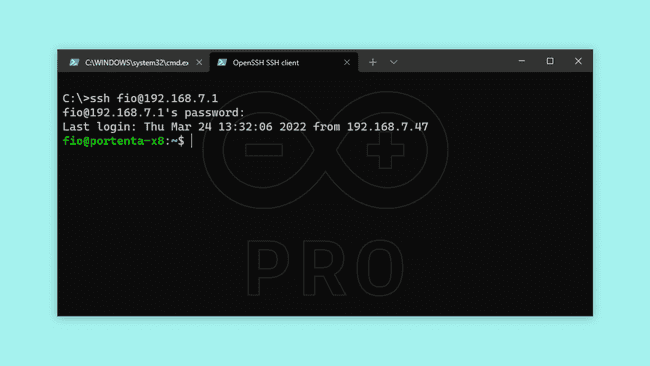
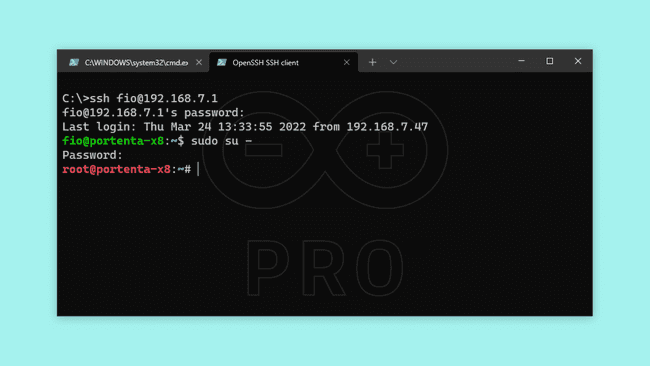
To communicate with your board, you will need to know the IP of it, and just type
ssh fio@<IP>fioAs it is a linux device, you can do normal stuff like creating files, changing directory, etc.
To gain admin (root) access, type
sudo su -fioCLI Commands
Connect to a Wi-Fi Access Point
Using the network manager tool
nmclinmcli device wifi connect <SSID> password <PASSWORD>To check your manager connection status, use this command:
nmcli deRegister Device to the FoundriesFactory
Make sure the name is not already being used in your Factory.
lmp-device-register -n <newDeviceName>Not recommended: In case you cannot register the new device, you can erase the current device info by stopping the OTA services and removing
/var/sota/sql.dbsudo systemctl stop aktualizr-litesudo systemctl stop fioconfig.pathsudo systemctl stop fioconfig.servicesudo rm /var/sota/sql.dbInspecting Real Time Tasks
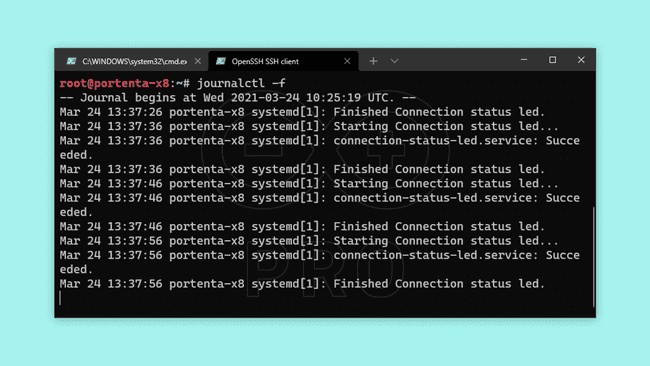
Run:
journalctl -f