
UNO R3
The Arduino UNO is the best board to get started with electronics and coding. If this is your first experience tinkering with the platform, the UNO is the most robust board you can start playing with. The UNO is the most used and documented board of the whole Arduino family.
Arduino UNO is a microcontroller board based on the ATmega328P. It has 14 digital input/output pins (of which 6 can be used as PWM outputs), 6 analog inputs, a 16 MHz ceramic resonator, a USB connection, a power jack, an ICSP header and a reset button. It contains everything needed to support the microcontroller; simply connect it to a computer with a USB cable or power it with a AC-to-DC adapter or battery to get started. You can tinker with your UNO without worrying too much about doing something wrong, worst case scenario you can replace the chip for a few dollars and start over again.


The ATmega328P can easily be replaced, as it is not soldered to the board.

The ATmega328P also features 1kb of EEPROM, a memory which is not erased when powered off.

The Arduino UNO features a barrel plug connector, that works great with a standard 9V battery.


Essentials
First Steps
Suggested Libraries
Arduino Basics
Tutorials
Use a potentiometer to control the blinking of an LED.
Read a potentiometer, print its state out to the Arduino Serial Monitor.
Turn an LED on and off every second.
Read a switch, print the state out to the Arduino Serial Monitor.
An overview of the classic Arduino UNO.
An in-depth look at the classic Arduino UNO board.
Learn how to dim an LED connected to the UNO R3 with MATLAB®.
Resources
Interactive Viewer
Interact with the schematics, the PCB and a 3D model of the product.
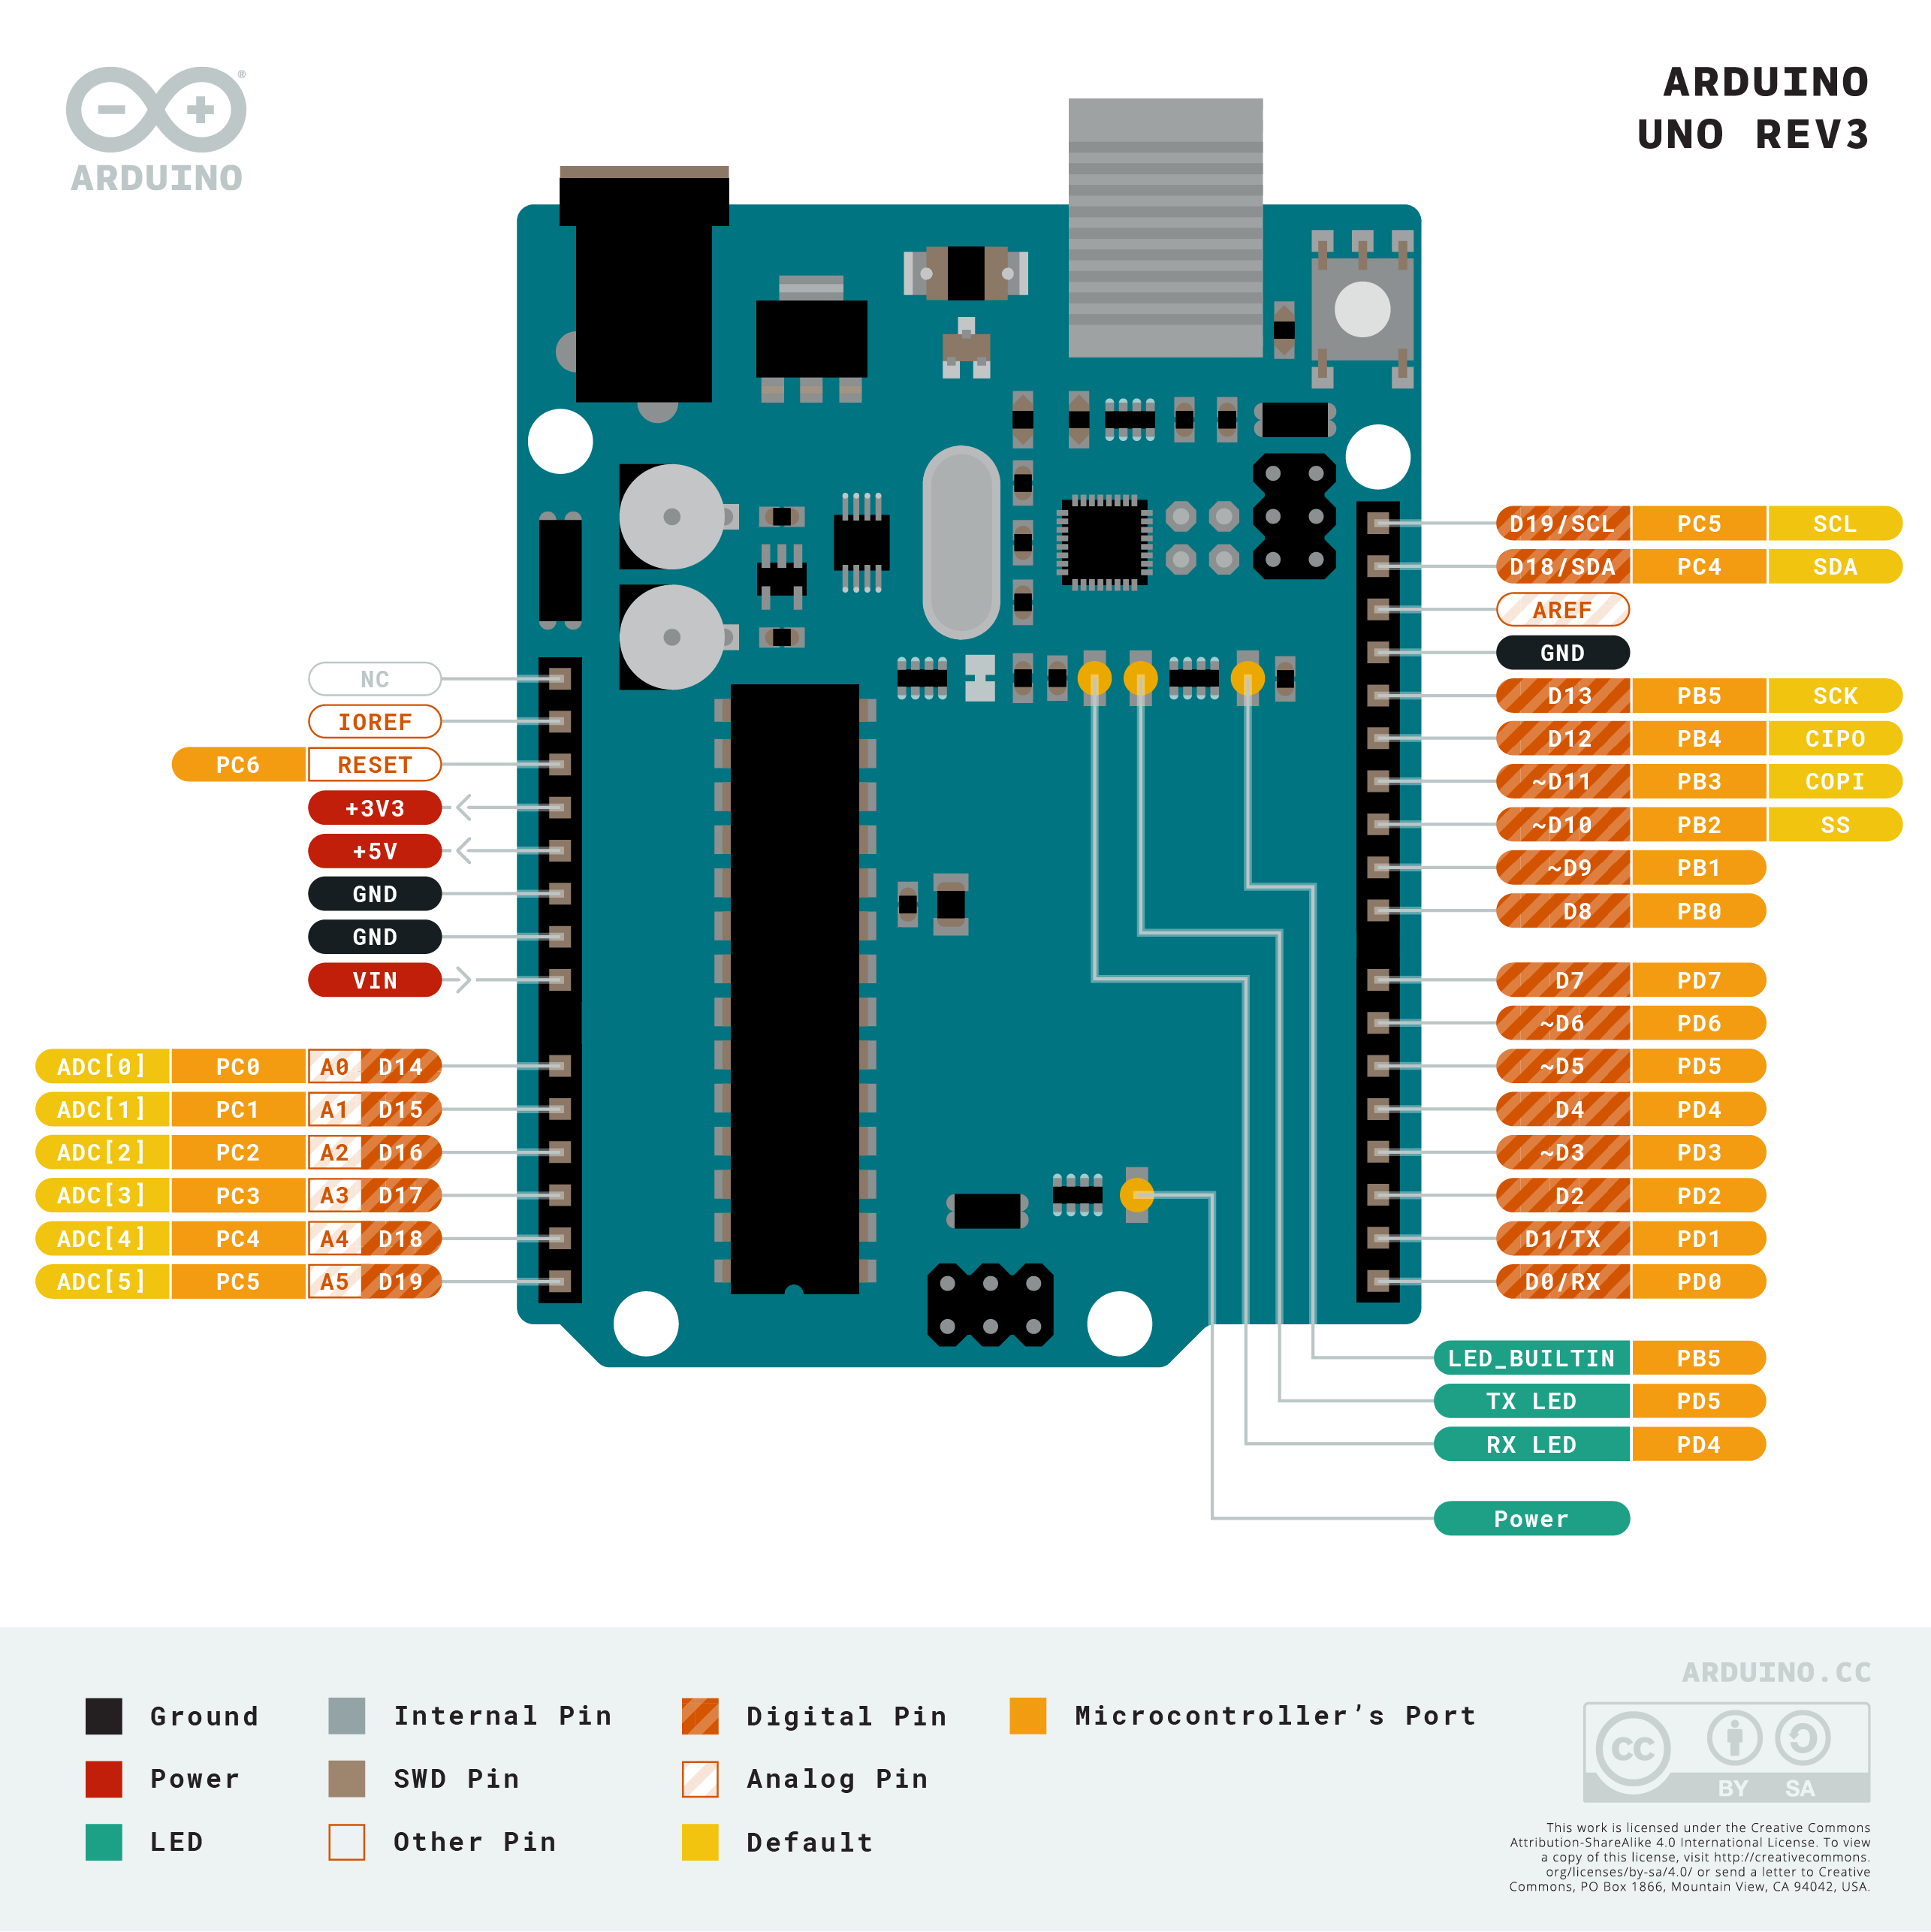
Pinout Diagram
A diagram showing the functions and the arrangement of the pins on your product.